Site inventory:
So we looked at this site, and squared it off like a rectangle for the inventory, to make the first time easy and encouraging. Just this part, not the L of the plant bed goin around the corner. You can do the same at any spot. Start to observe the plants and the basic elemental forces that surround them.

What do you see?
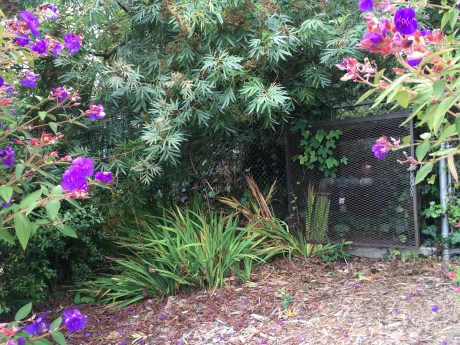
Plant wise, we see three princess flower bushes in the front, and about seven trees of Pittosporum tenuifolium kohukohu tawhiwhi as a hedge behind it. A tree in the back corner coming from the neighbor is catalina ironwood, and underneath the ironwood some irisy looking things – chasmanthe. On the ground are chips.
Water wise there are two irrigation boxes, one open with a purple headed quick coupler showing. And another box not sure what is inside. No visible signs of sprinklers or drip system, at least initially.
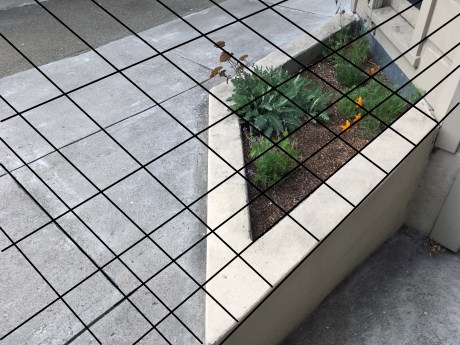
Hardscape wise there is a sitting wall retaining wall there on the right. Say about two feet tall or so. And the blue metal fence behind it. Lets look at it from another angle:
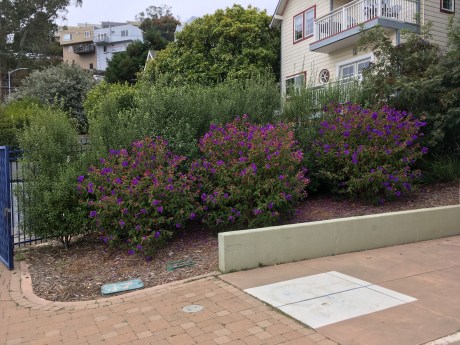
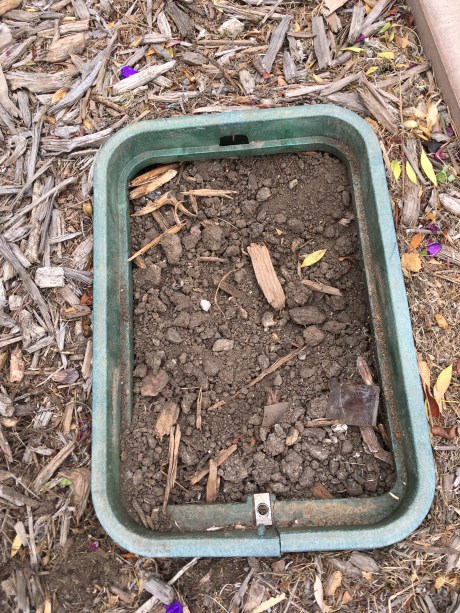
We took a compass reading. If you were one of the princess flowers with your back to the pittosporum hedge, you would be facing east. So it is pretty protected from the onshore wind with the hedge and the hill and houses back behind it. It is not out in the open like full on southern exposure but not too shady either. Protected. Not a bad spot that is why these purple flowers are blooming and blooming and blooming. Alright, goin in for a close look. Heres one box. Purple color indicates the water inside is recycled water. Meaning that it was flushed out one time to the water and waste treatment plant, they cleaned and disinfected it, and now its back watering the landscape. Not drinking water, recycled water for landscaping:

This the other:

And hope its okay to take a look. ????. Pass.
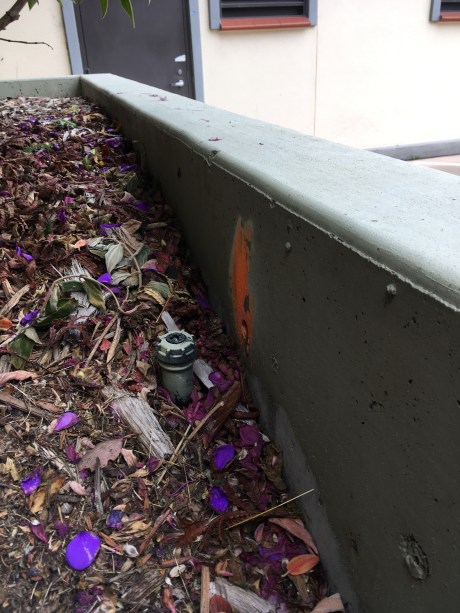
Go on up to the back, aha! Found a pop up sprinkler. Not sure when it comes on…
Beneath the ironwood is a large metal cage. It is part of the water system, a backflow prevention device. We will illustrate the principle and practice at a future time. For now keep an eye on it, once you have seen one, you will see them everywhere. Parks, schools, museums, etc.
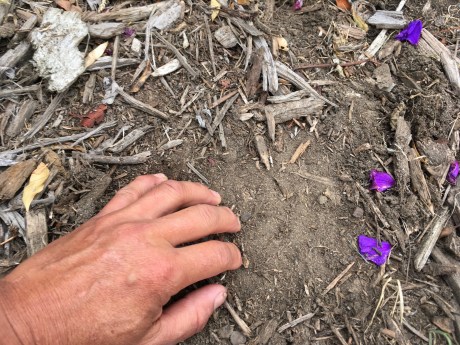
It would be nice to dig around in the soil and see what you are dealing with. The day we went it was foggy. The soil at the surface looked all wet. But as soon as you dug down less than half an inch it was dry as a bone. What does that mean? When is a bone dry? In the desert yes but usually it is moist and getting gnawed on by rodents for its calcium content.
Anyhow, when I went back later in the day to take pictures, even the surface had dried. Like this – a thin layer of mulch, a little bit of sandy soil. Should have had gloves on. Sorry. Safety first!
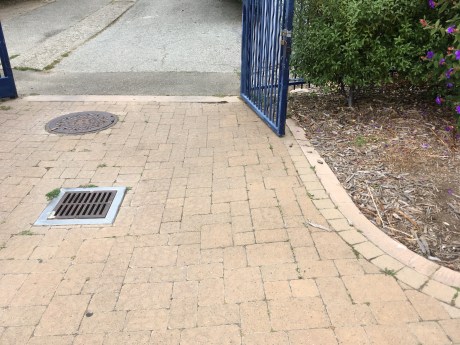
If you stand a little ways back you can then see the how the hardscape and the garden slope and irrigation run off would drain into a grate and catch basin. The man hole cover there leads to the sewer:
So a rough drawing not to scale would look something like this:

Thats all for site inventory. We will do them over and over again until you are intimate with the world and for all intensive purposes become a flowering plant. Or a fern if that is your preference.
Now we are going to get a little bit more accurate and less rough. When you set out to measure the yard, it is helpful bring some graph paper. Overlay the space with a grid with an x and y axis. Bring your graph paper. Easiest to have two long tapes and stretch em out if possible. Nice to work with a buddy system. This way you will be able to measure existing plants and structures with ease. We will use this brick raised bed as an example. I see a metal post on the left, aeonium succulents all around, an echium that was pruned hard that did not or has not come back yet (the bare thing of all branches), a santolina the gray silver foliage plant on the right, and some wooden fencing.

So let’s stretch out the tapes.
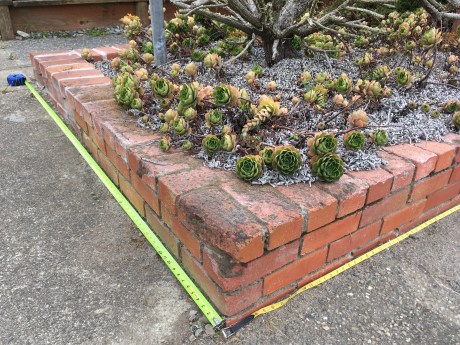
Length is here. Thirty feet!:

Width is here. Six feet ahhhh six inches. Round up. Close enough!

And lastly the height. Let’s say 10″ tall:

Now you can put this on your graph paper. And write copious notes all around to try to remember this site. Do note that I am drawing with a thick sized sharpy marker for online communication and emphasis. Don’t do like this in the real world! Use a nice pencil or pen, not a marker.

Lets say we want to draw the existing metal pole in our plan. You would look on the x axis of where it lines up. Looks about 1′-4″ here.

Then along the y axis. Looks like it lines up at about 4′ -2″. What is the diameter of the pole? Two inches? Got it. There you go…
So for every site, when you are doing your site survey and taking your measurements, just overlay, impose, layer a grid on top of it. This will improve your accuracy and make sure things are drawn to scale. Pick a nice origin (0,0) and go from there. Start at a square corner, take it X and Y. Even awkward diagonals and circles and curves are easier this way.
Now on to drafting. And eventually transferring that drawing on graph paper and that rough sketch into a presentable form.
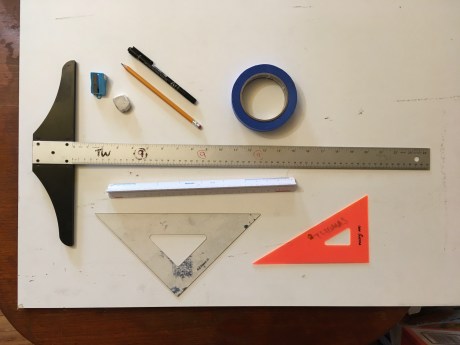
These are the basic tools you ought to have. The white thing is an architects ruler, not an engineers ruler. Make certain of that. The little numbers on the ends should say things like “1/4, 1/8, 1/2, 3/16”, not “10, 20″ and so on. Standard measurements not metric. There’s two plastic triangles here: one is a 45 45 90 degree triangle, the other is a 30 60 90 degree triangle. I prefer the orange one for our class. We will use it for an isometric drawing later in the semester. The black ink pen is a specialized technical drawing pen for drafting purposes. They run about 1.50 or 2 or 3 bucks, each. They are good in that their ink dries right away so it doesn’t end up smearing your paper, and they usually dont bust out on you and leak link out the tip like some ball point pens do. .5 or .8 mm are nice sizes for the pens. Underneath is a drawing table. The table should be able to fit paper that is 18″ x 24”. Ideally you have a quiet studio space to work, maybe even a drafting table that tips up real cool like so you don’t get as bad neck strain. But if you do not you will have to make do with a dining room table and its surface and edges. Perhaps pad it with the piece of cardboard that comes with the pad of drawing paper.
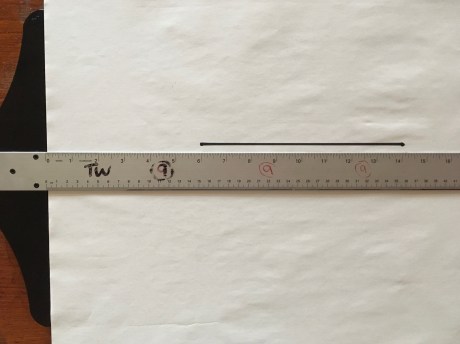
Scale. The whole idea of scale is that you cannot draw a garden life size on a huge piece of paper. Sure that would be cool as a modern art project but it is not practical to show a clients such a thing. So we will shrink it down so that it fits on our piece of paper. It must be accurate, to scale, so that a contractor can look at it and be able to figure out how big the deck you designed is, or how much concrete has to be brought in, and where to place so and so plant. So get your ruler out and look at it. Flip the triangular toblerone shaped ruler until until you find the one side that says 1/4 on one side and 1/8 on the other. The 1/4″ scale goes from the right and proceeds left. It is the lower row of numbers here that say 0 2 4 6 8 and so on. Ignore the 46. So if you want to draw something that is 8 feet long, start at the 0 and draw the line to the 8. The bunch of fine lines to the right of the 0 are to indicate the inches within one foot at 1/4 inch scale. It is a common mistake to start at the very right. Do not make that mistake! Start at the zero 0!!!
Heres the ruler on the left side with the 1/8 inch scale. This scale runs left to right. Use the numbers on the top row this time. Where it says 0, 4, 8, 12, 16, 20, and so on. So an 1/8 scale is half the size of an 1/4 inch scale. These are the two scales I am asking you to draw and practice for this lab. You can fudge a little bit in the drawing when it comes to itty bitty inches. Say if something is 14′-2″ you just go between the 14′ and the 15′. Half way between the two is 14′-6″. From 14′ to 14′-6″ you go about a third of the way and that is 14′-2″. Engineers are like what!? You landscape designers are so inaccurate! It should be down to nearest .0001 mm!! But this is a garden we are talking about. If you are off by 2 or even 3 inches it is usually not that big a deal. You can always make adjustment in the field by pushing a bit of dirt that way, adding half and inch, half and inch there and making up the difference. On the drawing itself, the pencil or pen line is already as thick as an inch or two even in the garden. So do not sweat it. The minutiae. Move on.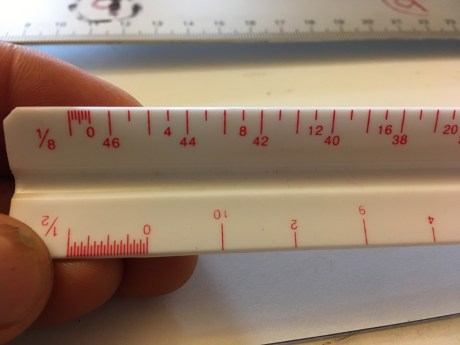
Here is an illustration of some of the scales on that same architect ruler you have. It is depicting what 40′ looks like at various scales:

Okay lets draw. We will start off with how you are not supposed to draw. If you just tape your piece of paper on your drawing board all willy nilly then it will look like this. Your lines will not be square with the paper. Everything will be tilted as if it wants to slip off the side of the hill.
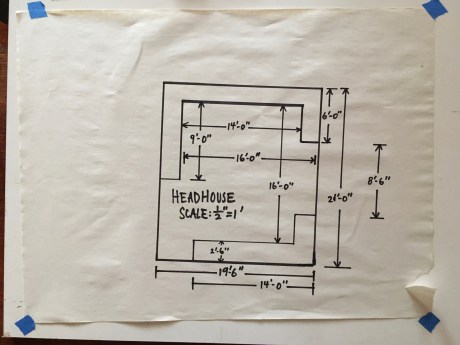
Then as you continue to draw the headhouse, you may be tempted to draw in all of the dimensions. To be thorough, to show that you are doing a lot of work. And the labels too! It may look like this after a while of intensive work.
You are thinking I am going to go over the top and get extra credit. What about if I put some plants in there too and hardscape and make the whole thing into a garden?!
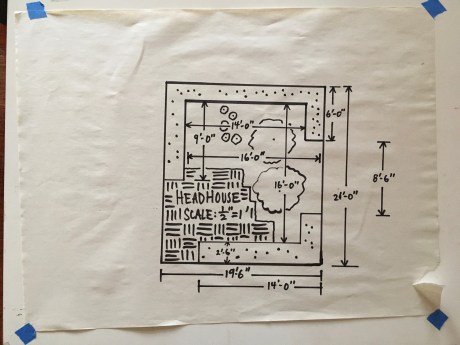
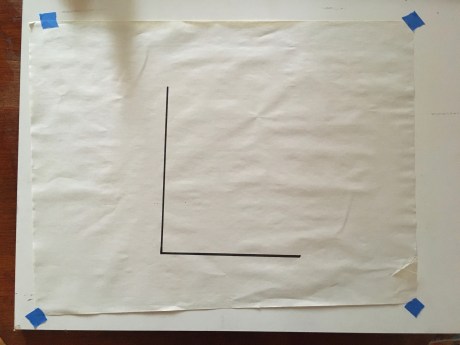
You have now gone way too far over the top and it is time to start over. Lets start at the beginning again. Again?! Crumple up the mistake and throw it to the compost and worms. They love cellulose. Fit your new sheet of paper to the drawing board by feeling along the edges so they all line up tight and square. Tape em down.
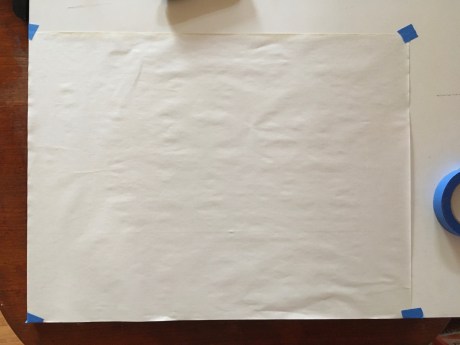
Edge like this:

If you know the dimensions of the plan you are going to draw, a helpful hint is to cut out a piece of paper of the same size, and put it on the paper. This way you can space it out so that is is centered and looks just right. This is a good method if you have two or even three separate drawings all fitting on the same piece of 18″ x 24″ paper. Layout.

Then you start to draw. Make two dots, connect em. Connect em in one smooth stroke one smooth breath. No thinking just go. By the way I am drawing with a fat sharpy permanent marker so that it shows up well on the screen. On your drawing you should be using pencil. Later we will go over it with an ink pen. For now pencil.
Boom
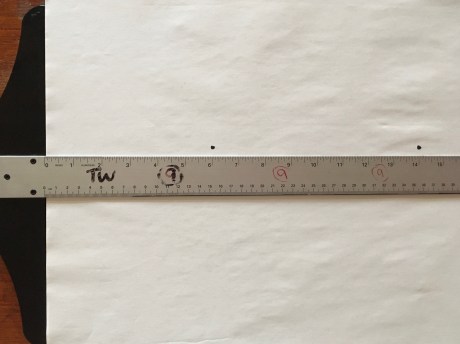
You will be using the ruler as you go, to get the correct measurements on paper. Sometimes I will run it along the top this way so that it is straight. Make sure your T square is set firm against the edge of the board no wobbly actions, or else lines will turn out crooked. Then its eraser marks and frustration and maybe ripped paper start over again. So draw light pencil lines that are visible but do not put too much weight behind it.
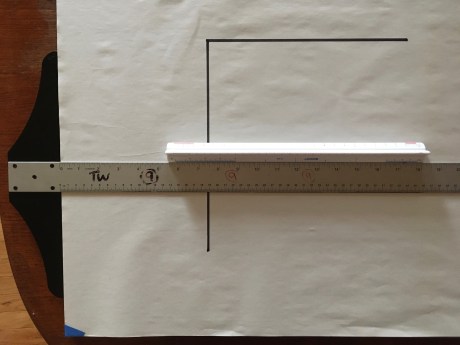
You can also use the triangle like this if you do not want to have to move the T square from side to side then up down then side to side. I did smudge the marker there. You can avoid smudging by using the technical ink drawing pens, and also some people tape pennies underneath the T square so it is slight teeny bit elevated and smudges less. So the ink does not get trapped underneath the hard flat edge.
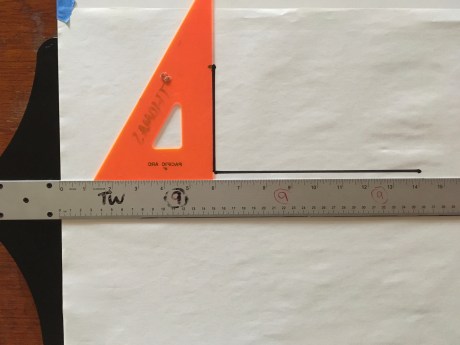
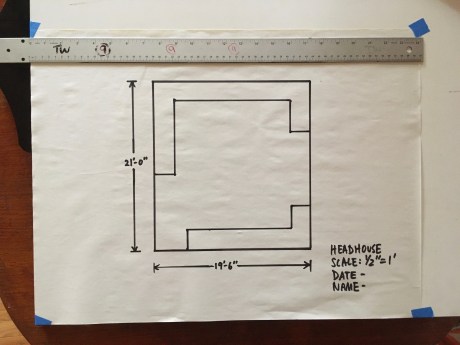
So just take the dimensions I’ve given you and draw the figure. I’ve simplified it here a bit but it is the same idea. Draw the dimensions lines indicating the length and width. Just those two are fine for our purposes. Too many dimension lines will take away from the overall CLARITY and CONCISENESS of the drawing. If a contractor wants to know how big the patio you have drawn is, they can pull out a ruler and measure it. The drawing is to SCALE.
These extension lines indicate the extent of the dimension lines, the end points. The termination point is indicated with arrowheads or a dash. Choose your own style, just be consistent throughout your drawings and dont switch it up back and forth. CONSISTENCY.

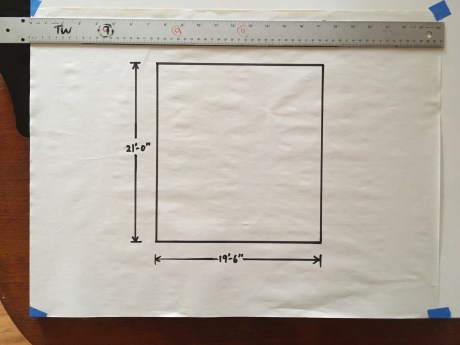
Finish the labelling and you are done. Easy clear simple and concise. That is what we are striving for.
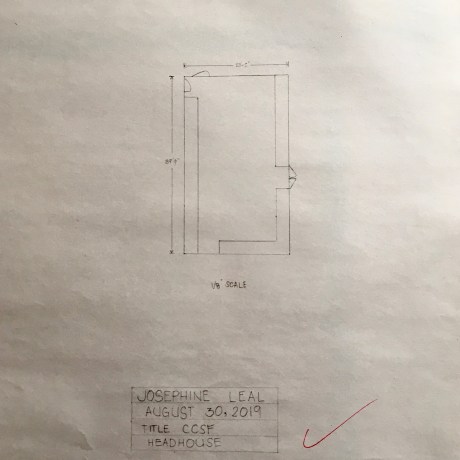
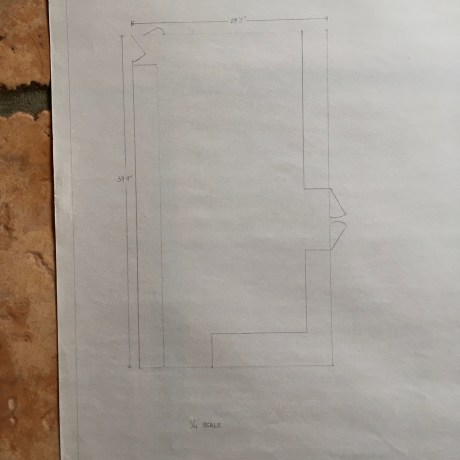
Here is a student’s sample from last years. Thank you Josephine! Okay give it a shot. Notice how the 1/4 inch scale is bigger than the 1/8 inch scale. Those are doors swinging open. If you were here I could show you the door to the back classroom, the door to the shop and garage, and the double doors that lead to our greenhouses. Alas…
C’est tout! Fini! Hopefully not too bad for a first draft.